先附上参考资料
http://www.jianshu.com/p/16cb14f53933
https://developer.apple.com/library/content/samplecode/AVSimpleEditoriOS/Introduction/Intro.html
https://github.com/objcio/VideoCaptureDemo
https://github.com/gsixxxx/DTSmallVideo
https://github.com/AndyFightting/VideoRecord
卷首吐槽语
这还是第一次接触自定义界面录制视频,包括各种参数的设置,不得不说,录制视频这块,各种类,各种方法,蛮复杂的,网上的资料也是各种杂乱,想要弄清楚还真是得费一番功夫,我参考了大量资料,根据自己的思路整理了一遍,按照我的思路来,保证你看一遍就会,我这里只是简单的录制,压缩,剪裁,导出等功能,不设计滤镜,添加背景音乐,合并,字幕等等,重要的是这个流程,主流程会了,其他也就是锦上添花了。
先附上dome demo地址
我的blog看更加方便,左侧有目录
点击进入我的blog文章地址
脑图
方便大家对三中录制方式有一个大概的了解,看一下这张图片。
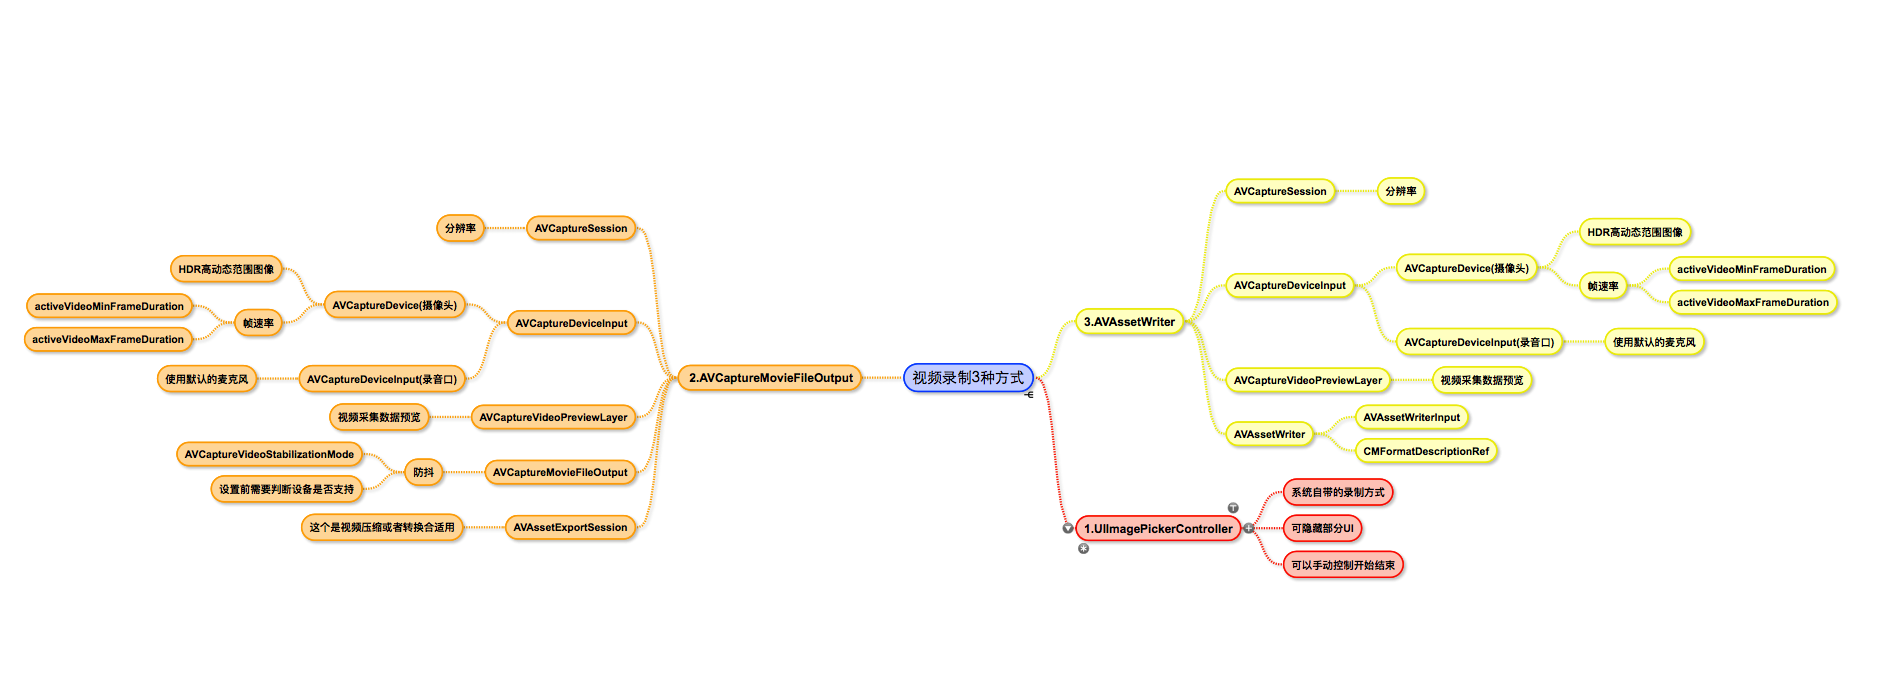
第一种采用系统的录制较为简单,详细介绍后面两种。
效果图
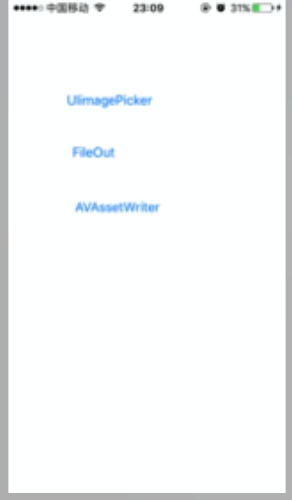
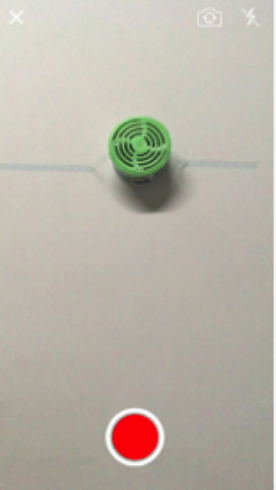
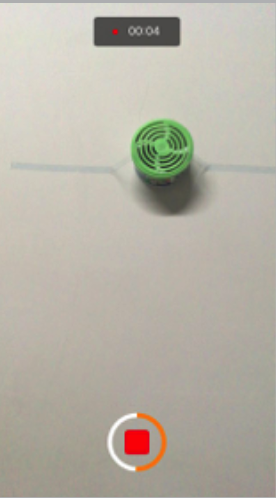
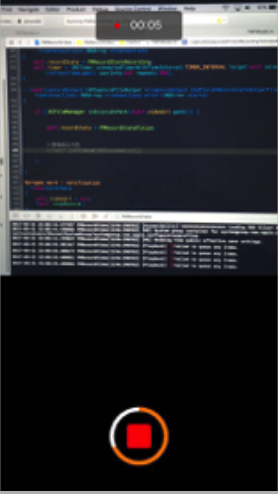
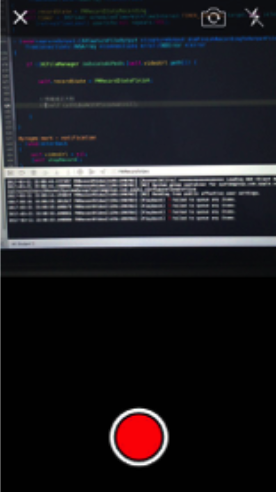
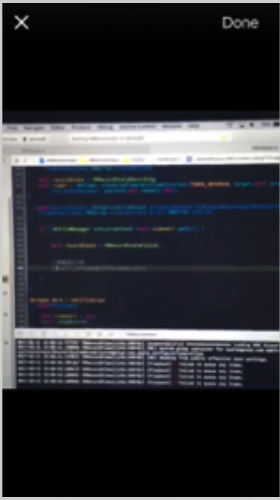
demo中把三种方式单独分开,便于学习。支持闪光灯,切换镜头,录制不同尺寸的视频等。
1.UIImagePickerController
这种方式只能设置一些简单参数,自定义程度不高,只能自定义界面上的操作按钮,还有视频的画质等。
- (void)viewDidLoad
{
    [super viewDidLoad];

    if ([self isVideoRecordingAvailable]) {
        return;
    }
    self.sourceType = UIImagePickerControllerSourceTypeCamera;
    self.mediaTypes = @[(NSString *)kUTTypeMovie];
    self.delegate = self;

    //隐藏系统自带UI
    self.showsCameraControls = NO;
    //设置摄像头
    [self switchCameraIsFront:NO];
    //设置视频画质类别
    self.videoQuality = UIImagePickerControllerQualityTypeMedium;
    //设置散光灯类型
    self.cameraFlashMode = UIImagePickerControllerCameraFlashModeAuto;
    //设置录制的最大时长
    self.videoMaximumDuration = 20;
}
- (BOOL)isVideoRecordingAvailable
{
    if([UIImagePickerController isSourceTypeAvailable:UIImagePickerControllerSourceTypeCamera]){
        NSArray *availableMediaTypes = [UIImagePickerController availableMediaTypesForSourceType:UIImagePickerControllerSourceTypeCamera];
        if([availableMediaTypes containsObject:(NSString *)kUTTypeMovie]){
            return YES;
        }
    }
    return NO;
}

- (void)switchCameraIsFront:(BOOL)front
{
    if (front) {
        if([UIImagePickerController isCameraDeviceAvailable:UIImagePickerControllerCameraDeviceFront]){
            [self setCameraDevice:UIImagePickerControllerCameraDeviceFront];

        }
    } else {
        if([UIImagePickerController isCameraDeviceAvailable:UIImagePickerControllerCameraDeviceRear]){
            [self setCameraDevice:UIImagePickerControllerCameraDeviceRear];

        }
    }
}
2.AVCaptureSession+AVCaptureMovieFileOutput
流程:
1. 创建捕捉会话
2. 设置视频的输入
3. 设置音频的输入
4. 输出源设置,这里视频,音频数据会合并到一起输出,在代理方法中国也可以单独拿到视频或者音频数据,给AVCaptureMovieFileOutput指定路径,开始录制之后就会向这个路径写入数据
5. 添加视频预览层
6. 开始采集数据,这个时候还没有写入数据,用户点击录制后就可以开始写入数据
0. 创建捕捉会话
 self.session = [[AVCaptureSession alloc] init];
    if ([_session canSetSessionPreset:AVCaptureSessionPreset640x480]) {//设置分辨率
        _session.sessionPreset=AVCaptureSessionPreset640x480;
    }
1. 视频的输入
   - (void)setUpVideo
{
    // 1.1 获取视频输入设备(摄像头)
    AVCaptureDevice *videoCaptureDevice=[self getCameraDeviceWithPosition:AVCaptureDevicePositionBack];//取得后置摄像头

    // 视频 HDR (高动态范围图像)
    // videoCaptureDevice.videoHDREnabled = YES;
    // 设置最大,最小帧速率
    //videoCaptureDevice.activeVideoMinFrameDuration = CMTimeMake(1, 60);
    // 1.2 创建视频输入源
    NSError *error=nil;
    self.videoInput= [[AVCaptureDeviceInput alloc] initWithDevice:videoCaptureDevice error:&error];
    // 1.3 将视频输入源添加到会话
    if ([self.session canAddInput:self.videoInput]) {
        [self.session addInput:self.videoInput];

    }
}
2. 音频的输入
// 2.1 获取音频输入设备
    AVCaptureDevice *audioCaptureDevice=[[AVCaptureDevice devicesWithMediaType:AVMediaTypeAudio] firstObject];
    NSError *error=nil;
    // 2.2 创建音频输入源
    self.audioInput = [[AVCaptureDeviceInput alloc] initWithDevice:audioCaptureDevice error:&error];
    // 2.3 将音频输入源添加到会话
    if ([self.session canAddInput:self.audioInput]) {
        [self.session addInput:self.audioInput];
    }
3.输出源设置
- (void)setUpFileOut
{
    // 3.1初始化设备输出对象,用于获得输出数据
    self.FileOutput=[[AVCaptureMovieFileOutput alloc]init];

    // 3.2设置输出对象的一些属性
    AVCaptureConnection *captureConnection=[self.FileOutput connectionWithMediaType:AVMediaTypeVideo];
    //设置防抖
    //视频防抖 是在 iOS 6 和 iPhone 4S 发布时引入的功能。到了 iPhone 6,增加了更强劲和流畅的防抖模式,被称为影院级的视频防抖动。相关的 API 也有所改动 (目前为止并没有在文档中反映出来,不过可以查看头文件)。防抖并不是在捕获设备上配置的,而是在 AVCaptureConnection 上设置。由于不是所有的设备格式都支持全部的防抖模式,所以在实际应用中应事先确认具体的防抖模式是否支持:
    if ([captureConnection isVideoStabilizationSupported ]) {
        captureConnection.preferredVideoStabilizationMode=AVCaptureVideoStabilizationModeAuto;
    }
    //预览图层和视频方向保持一致
    captureConnection.videoOrientation = [self.previewlayer connection].videoOrientation;

    // 3.3将设备输出添加到会话中
    if ([_session canAddOutput:_FileOutput]) {
        [_session addOutput:_FileOutput];
    }
}
4. 视频预览层
一进入视频录制界面,这个时候 session就已经在采集数据了,并把数据显示在预览层上,用户选择录制后,再将采集到的数据写入文件。
    - (void)setUpPreviewLayerWithType:(FMVideoViewType )type
{
    CGRect rect = CGRectZero;
    switch (type) {
        case Type1X1:
            rect = CGRectMake(0, 0, kScreenWidth, kScreenWidth);
            break;
        case Type4X3:
            rect = CGRectMake(0, 0, kScreenWidth, kScreenWidth*4/3);
            break;
        case TypeFullScreen:
            rect = [UIScreen mainScreen].bounds;
            break;
        default:
            rect = [UIScreen mainScreen].bounds;
            break;
    }
    self.previewlayer.frame = rect;
    [_superView.layer insertSublayer:self.previewlayer atIndex:0];
}
5. 开始采集画面
[self.session startRunning];
6.开始录制
- (void)writeDataTofile
{
    NSString *videoPath = [self createVideoFilePath];
    self.videoUrl = [NSURL fileURLWithPath:videoPath];
    [self.FileOutput startRecordingToOutputFileURL:self.videoUrl recordingDelegate:self];

}
3.AVCaptureSession+AVAssetWriter
流程:
1. 创建捕捉会话
2. 设置视频的输入 和 输出
3. 设置音频的输入 和 输出
4. 添加视频预览层
5. 开始采集数据,这个时候还没有写入数据,用户点击录制后就可以开始写入数据
6. 初始化AVAssetWriter, 我们会拿到视频和音频的数据流,用AVAssetWriter写入文件,这一步需要我们自己实现。
1. 创建捕捉会话
需要确保在同一个队列,最好队列只创建一次
 self.session = [[AVCaptureSession alloc] init];
    if ([_session canSetSessionPreset:AVCaptureSessionPreset640x480]) {//设置分辨率
        _session.sessionPreset=AVCaptureSessionPreset640x480;
    }
2.设置视频的输入 和 输出
- (void)setUpVideo
{
    // 2.1 获取视频输入设备(摄像头)
    AVCaptureDevice *videoCaptureDevice=[self getCameraDeviceWithPosition:AVCaptureDevicePositionBack];//取得后置摄像头
    // 2.2 创建视频输入源
    NSError *error=nil;
    self.videoInput= [[AVCaptureDeviceInput alloc] initWithDevice:videoCaptureDevice error:&error];
    // 2.3 将视频输入源添加到会话
    if ([self.session canAddInput:self.videoInput]) {
        [self.session addInput:self.videoInput];
    }

    self.videoOutput = [[AVCaptureVideoDataOutput alloc] init];
    self.videoOutput.alwaysDiscardsLateVideoFrames = YES; //立即丢弃旧帧,节省内存,默认YES
    [self.videoOutput setSampleBufferDelegate:self queue:self.videoQueue];
    if ([self.session canAddOutput:self.videoOutput]) {
        [self.session addOutput:self.videoOutput];
    }

}
3. 设置音频的输入 和 输出
- (void)setUpAudio
{
    // 2.2 获取音频输入设备
    AVCaptureDevice *audioCaptureDevice=[[AVCaptureDevice devicesWithMediaType:AVMediaTypeAudio] firstObject];
    NSError *error=nil;
    // 2.4 创建音频输入源
    self.audioInput = [[AVCaptureDeviceInput alloc] initWithDevice:audioCaptureDevice error:&error];
    // 2.6 将音频输入源添加到会话
    if ([self.session canAddInput:self.audioInput]) {
        [self.session addInput:self.audioInput];
    }

    self.audioOutput = [[AVCaptureAudioDataOutput alloc] init];
    [self.audioOutput setSampleBufferDelegate:self queue:self.videoQueue];
    if([self.session canAddOutput:self.audioOutput]) {
        [self.session addOutput:self.audioOutput];
    }

}
4. 添加视频预览层
  - (void)setUpPreviewLayerWithType:(FMVideoViewType )type
{
    CGRect rect = CGRectZero;
    switch (type) {
        case Type1X1:
            rect = CGRectMake(0, 0, kScreenWidth, kScreenWidth);
            break;
        case Type4X3:
            rect = CGRectMake(0, 0, kScreenWidth, kScreenWidth*4/3);
            break;
        case TypeFullScreen:
            rect = [UIScreen mainScreen].bounds;
            break;
        default:
            rect = [UIScreen mainScreen].bounds;
            break;
    }

    self.previewlayer.frame = rect;
    [_superView.layer insertSublayer:self.previewlayer atIndex:0];
}
5. 开始采集画面
[self.session startRunning];
6. 初始化AVAssetWriter
AVAssetWriter 写入数据的过程需要在子线程中执行,并且每次写入数据都需要保证在同一个线程。
- (void)setUpWriter
{
    self.videoUrl = [[NSURL alloc] initFileURLWithPath:[self createVideoFilePath]];
    self.writeManager = [[AVAssetWriteManager alloc] initWithURL:self.videoUrl viewType:_viewType];
    self.writeManager.delegate = self;

}
7.拿到数据流后处理
视频数据和音频数据需要分开处理
- (void)captureOutput:(AVCaptureOutput *)captureOutput didOutputSampleBuffer:(CMSampleBufferRef)sampleBuffer fromConnection:(AVCaptureConnection *)connection
{
    @autoreleasepool {

        //视频
        if (connection == [self.videoOutput connectionWithMediaType:AVMediaTypeVideo]) {

            if (!self.writeManager.outputVideoFormatDescription) {
                @synchronized(self) {
                    CMFormatDescriptionRef formatDescription = CMSampleBufferGetFormatDescription(sampleBuffer);
                    self.writeManager.outputVideoFormatDescription = formatDescription;
                }
            } else {
                @synchronized(self) {
                    if (self.writeManager.writeState == FMRecordStateRecording) {
                        [self.writeManager appendSampleBuffer:sampleBuffer ofMediaType:AVMediaTypeVideo];
                    }

                }
            }


        }

        //音频
        if (connection == [self.audioOutput connectionWithMediaType:AVMediaTypeAudio]) {
            if (!self.writeManager.outputAudioFormatDescription) {
                @synchronized(self) {
                    CMFormatDescriptionRef formatDescription = CMSampleBufferGetFormatDescription(sampleBuffer);
                    self.writeManager.outputAudioFormatDescription = formatDescription;
                }
            }
            @synchronized(self) {

                if (self.writeManager.writeState == FMRecordStateRecording) {
                    [self.writeManager appendSampleBuffer:sampleBuffer ofMediaType:AVMediaTypeAudio];
                }

            }

        }
    }

}
我们拿到最原始的数据以后,可以对其进行各种参数的设置
- (void)setUpWriter
{
    self.assetWriter = [AVAssetWriter assetWriterWithURL:self.videoUrl fileType:AVFileTypeMPEG4 error:nil];
    //写入视频大小
    NSInteger numPixels = self.outputSize.width * self.outputSize.height;
    //每像素比特
    CGFloat bitsPerPixel = 6.0;
    NSInteger bitsPerSecond = numPixels * bitsPerPixel;

    // 码率和帧率设置
    NSDictionary *compressionProperties = @{ AVVideoAverageBitRateKey : @(bitsPerSecond),
                                             AVVideoExpectedSourceFrameRateKey : @(30),
                                             AVVideoMaxKeyFrameIntervalKey : @(30),
                                             AVVideoProfileLevelKey : AVVideoProfileLevelH264BaselineAutoLevel };

    //视频属性
    self.videoCompressionSettings = @{ AVVideoCodecKey : AVVideoCodecH264,
                                       AVVideoScalingModeKey : AVVideoScalingModeResizeAspectFill,
                                       AVVideoWidthKey : @(self.outputSize.height),
                                       AVVideoHeightKey : @(self.outputSize.width),
                                       AVVideoCompressionPropertiesKey : compressionProperties };

    _assetWriterVideoInput = [AVAssetWriterInput assetWriterInputWithMediaType:AVMediaTypeVideo outputSettings:self.videoCompressionSettings];
    //expectsMediaDataInRealTime 必须设为yes,需要从capture session 实时获取数据
    _assetWriterVideoInput.expectsMediaDataInRealTime = YES;
    _assetWriterVideoInput.transform = CGAffineTransformMakeRotation(M_PI / 2.0);


    // 音频设置
    self.audioCompressionSettings = @{ AVEncoderBitRatePerChannelKey : @(28000),
                                       AVFormatIDKey : @(kAudioFormatMPEG4AAC),
                                       AVNumberOfChannelsKey : @(1),
                                       AVSampleRateKey : @(22050) };


    _assetWriterAudioInput = [AVAssetWriterInput assetWriterInputWithMediaType:AVMediaTypeAudio outputSettings:self.audioCompressionSettings];
    _assetWriterAudioInput.expectsMediaDataInRealTime = YES;


    if ([_assetWriter canAddInput:_assetWriterVideoInput]) {
        [_assetWriter addInput:_assetWriterVideoInput];
    }else {
        NSLog(@"AssetWriter videoInput append Failed");
    }
    if ([_assetWriter canAddInput:_assetWriterAudioInput]) {
        [_assetWriter addInput:_assetWriterAudioInput];
    }else {
        NSLog(@"AssetWriter audioInput Append Failed");
    }


    self.writeState = FMRecordStateRecording;
}
设置好参数以后,就可以写入文件了。AVAssetWriter数据写入的过程有点复杂,demo中我新建AVAssetWriteManager分离出AVAssetWriter,单独处理写数据,这样逻辑会清晰一点。
fileOut和writer的相同点和不同点
从上面的两个流程大致可以看出来,
相同点:数据采集都在AVCaptureSession中进行,视频和音频的输入都一样,画面的预览一致。
不同点:
输出不一致, AVCaptureMovieFileOutput 只需要一个输出即可,指定一个文件路后,视频和音频会写入到指定路径,不需要其他复杂的操作。
AVAssetWriter 需要 AVCaptureVideoDataOutput 和 AVCaptureAudioDataOutput 两个单独的输出,拿到各自的输出数据后,然后自己进行相应的处理。
可配参数不一致,AVAssetWriter可以配置更多的参数。
视频剪裁不一致,AVCaptureMovieFileOutput 如果要剪裁视频,因为系统已经把数据写到文件中了,我们需要从文件中独到一个完整的视频,然后处理;而AVAssetWriter我们拿到的是数据流,还没有合成视频,对数据流进行处理,所以两则剪裁方式也是不一样。
其他添加背景音乐,水印等也是不一样的,这里没有涉及就不介绍了。到这里也差不多了,文章也有点长了。这些是我自己整理资料总结出来的,不排除会有一些错误之处,供大家学习参考,希望有所收获。如果方便,还请为我star一个,也算是对我的支持。
